

Everything about this restoration was remarkable-the house exterior (which motivated me to place my flyer in the mailbox), the response (within 24 hours), the interior of the house (which contained three pocket door openings), the resolve of the owners (who are known to generations of concert goers in New England),
Epic (length) Repairs
and the rather dramatic way in which the "non-repair" was accomplished! As we removed the jamb trim boards, I beheld a Prescott trackless hanger-still functioning after 130 years. This was a time capsule containing the work of a blacksmith from the 1880s.
Like I say elsewhere in my literature, the first thing I did was "to look high"-and when I saw no shadow or recess above, i.e. no hollow soffit overhead the door, I said to him, "This door has no upper track or wheel assemblies. Therefore it must supported by sheaves in the bottom of the door." Although that is generally the case-that doors are either top hung or bottom sheave supported, I must say that...thinking about it now, I was a little naive. Why? Because bottom wheel doors have either a track or a steel dowel fastened to the floor OR they have a shallow groove cut into the surface. This pocket door opening had neither.
Ron's door was doing a "nose dive" into the floor, but there was certainly no track or groove. I used a stout piece of sheet metal to "sweep beneath the door" hoping to detect metal casters or wheels. Nothing. I turned to him and said, "There is only one explanation. Your door is suspended by a series of articulated levers or metal bars which, acting in scissor fashion, keep the door perpetually in mid-air and allow the door to be moved without wheels."
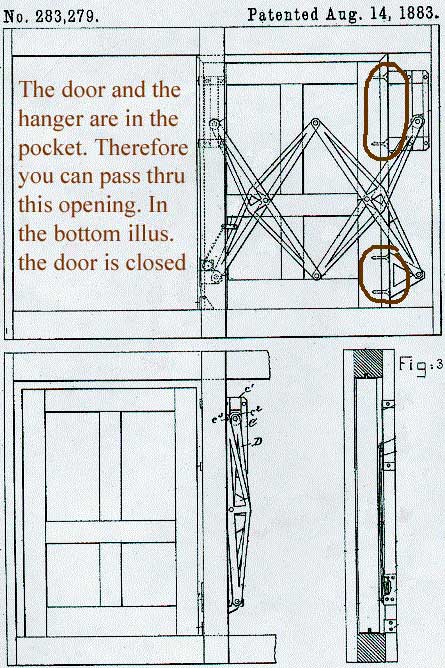
I knew what I was talking about because I had already downloaded this Prescott patent. But, just as there is a difference between seeing a picture of a tiger in a school book and going to the zoo, I had only read about Prescott's amazing invention. <:d)
Ron explained that the 5' wide door was scraping the floor...that (when they had dinner guests) they would like to be able to leave the dining room, close the pocket door and entertain friends or give recitals in other rooms. (Their house is from the days when there would have been servants to clear the dining room table immediately-but no servants are found now!)
City Mouse Country Mouse
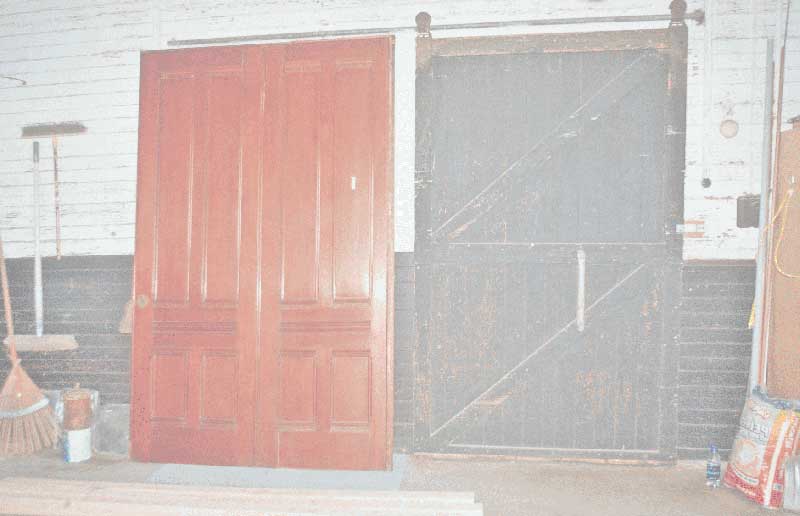
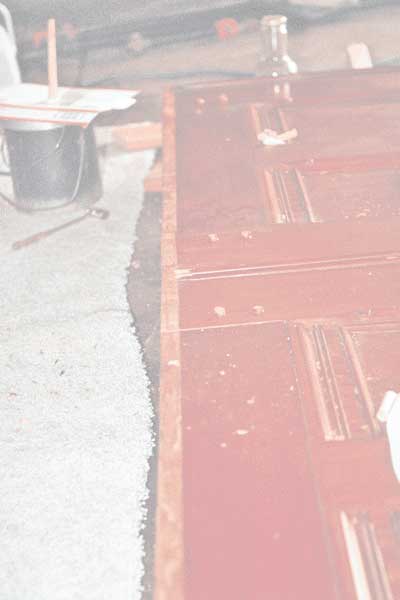
Once I removed the three huge lag screws which held the trailing edge of the door to the Prescott door hanger, the door was taken to the carriage house. I was astonished to see another pocket door there already-Well, a barn door actually...attached to a surface mounted track or bar. So, remembering the children's books I read to my daughters, I began to refer to the polished house door as "City Mouse" and to refer to the barn door as "Country Mouse."
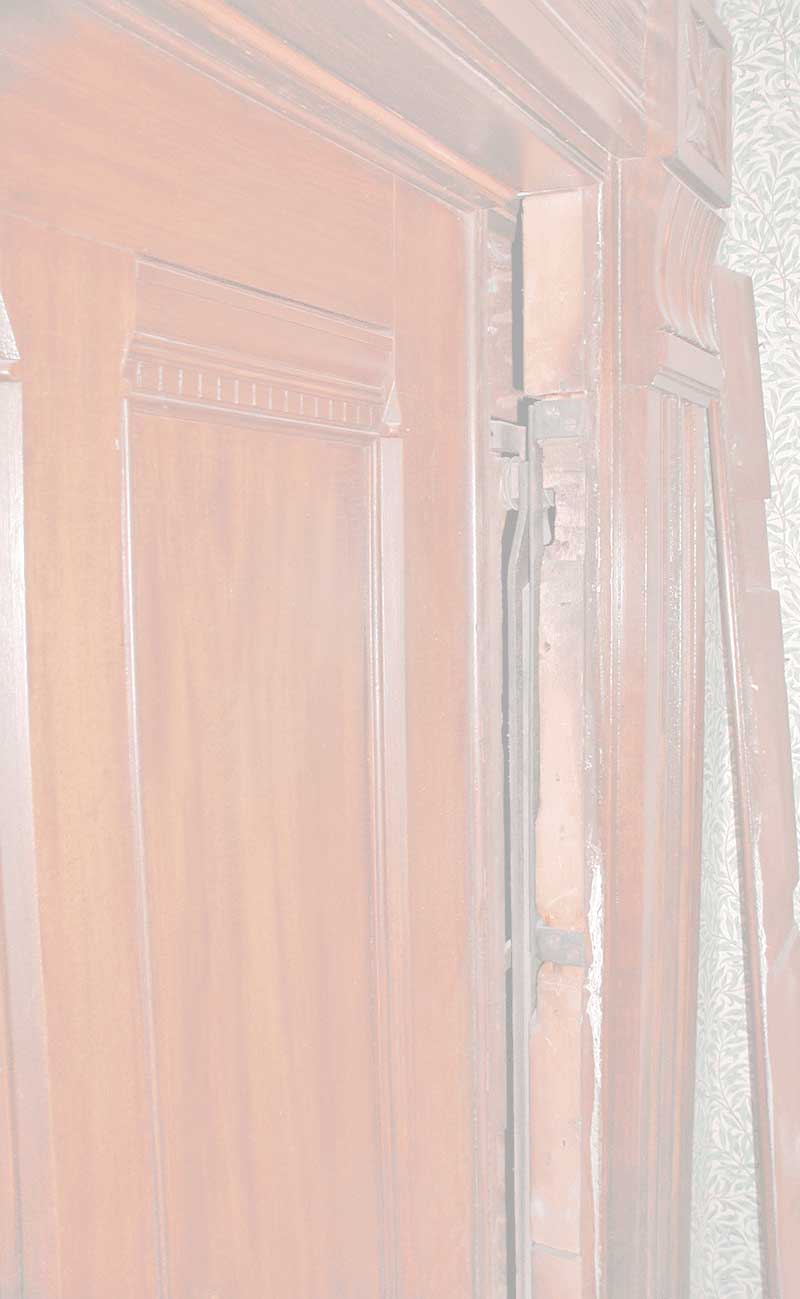
We took off jamb trim and saw stout metal arms and brackets!! (Note: this photo was taken by me at another pocket door opening in the same house). We examined the door looking for clues and realized the door was no longer a rectangle. The glue joints had dried out and there were long, narrow triangular gaps between the stiles (vertical) and the rails (horizontal). I smiled and told Ron, "You need a pocket door restorer whose background includes being a furniture repairman!"

Our door was secured to the hanger with 3 huge lag screws (high, middle & low). The plan was to remove the door, take it out to the carriage house (where it could be laid flat) and to reglue the door so it would be square once again. But how? Ron was not enthusiastic about me punching holes in the wall because the hallway wallpaper could not be replaced. Incredibly, we discovered that by switching off an electric circuit and removing a wall switch (and its elec.box) and by removing a wall sconce (and its elec.box) I could insert my hand and, little by little, remove the two highest lag screws! On the other side of the wall (in the dining room) I removed wooden baseboard and that was the path to the bottom lag screw.
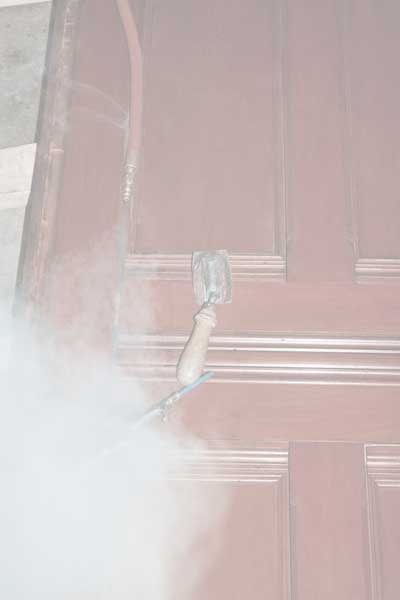
I used a wallpaper steamer to soften the 1890s hide glue. An air compressor helped in cleaning the wood joints.
The glue joints (I used classic hide glue for the sake of compatibility) were "cross-pinned" with hardwood dowels so the door would not slump or sag in the future. The dowels were cut flat and stained to match the original finish.
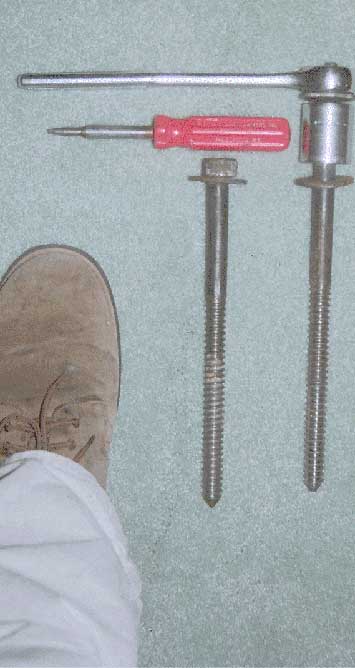
To appreciate the size of the screws...they are longer than my shoes.


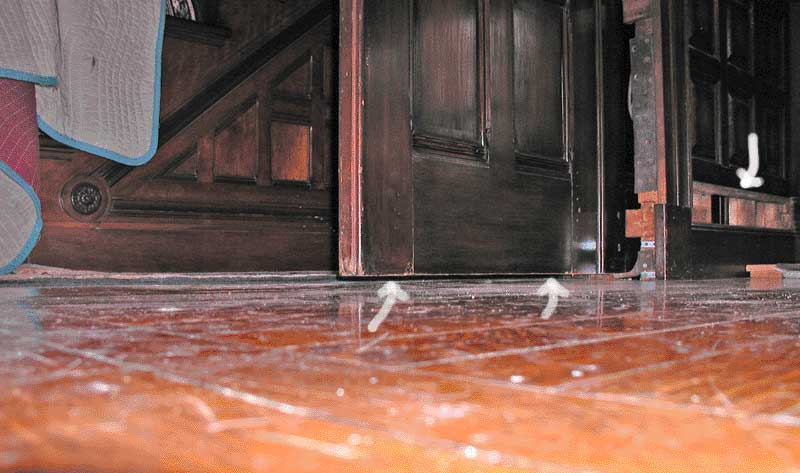
Here is the payoff! The door is installed and is gliding level-no longer scraping. I took this photo in the prone position. The door is positioned halfway out of the pocket. Notice the arrow to the right which shows the baseboard removed-once again...this was the access to getting a socket wrench inside the pocket-for removing the lower lag screw.