Regulating horizontal movement
This discussion is only about pocket door installations in pairs. For a single door, the issues of horizontal limits are different.
On most every other page of this website, the information I present is focused on how to get doors moving. That is to say; through my reports of different repairs or restorations, a reader can learn how pocket doors slide, how pocket doors hang and how to uncover hidden pocket doors. Customers sometimes hear me say, "Fixing your doors is just a matter of identifying the obstacles to movement- solving one obstruction after another- until there is clearance and free movement."
Let's face it. If people see the edge of a door (leaning back) at an angle against the door jamb, they know there's a problem. It's no fun tugging on a door that is a scraping the floor. So my motto is,
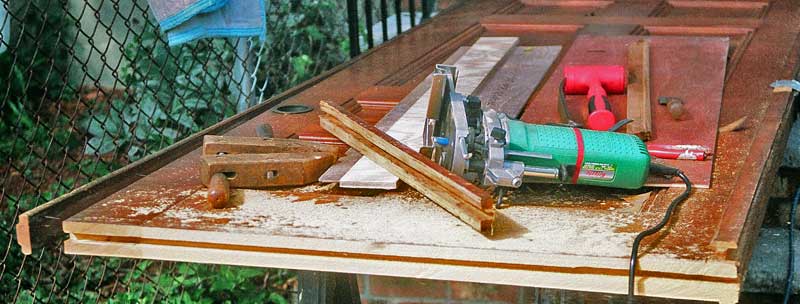
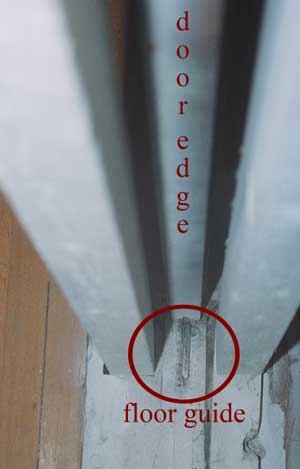
Top hung pocket doors have a hidden groove which faces the floor. It's like a tunnel-the groove is 1/2" wide and about 5/8" tall...and passes silently (hopefully!) over a floor guide. Notice: In the above picture, where it was necessary to cut the door bottoms (this door is one of a pair), you will see on the left that the meeting molding is NOT grooved. I took extra care to unnail it and hold it off to the side. For appearances' sake the meeting molding should remain intact.
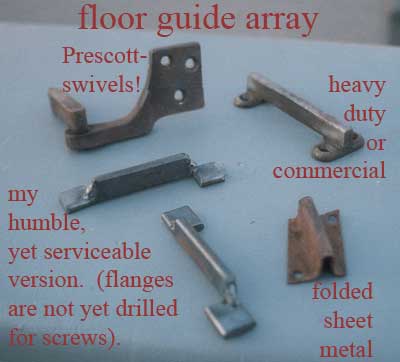
Since I have said elsewhere that everything in pocket doors is ratios, proportions and clearance, it is now appropriate to mention the position of the floor guide. Because the finish flooring on which we walk does not usually extend into the pocket, the little cast iron floor guide needs to be mounted atop a scrap piece of wood-centered at the opening to the pocket.
After all...that's the goal. Once their doors are operational again, it is a thrill to hear people say, "These doors had not worked for as long as I can remember (growing up in this house, etc.) But there's another level of repair which I make available to my customers. They hear from me concerning depth stops, floor guides, "cast iron dogs", center stops and outriggers. These regulators of horizontal movement were not an option at the time of installation-they were part of the workings of pocket doors.
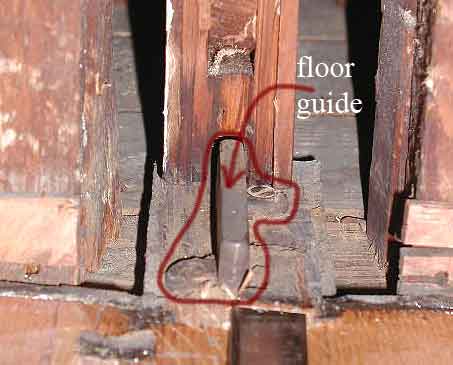
Floor guides are usually short (four inches long) cast iron strips-like a metal rail. Some are made from folded sheet metal. Don't be misled by the right photo...here the jamb trim strips are removed during a fire reconstruction job. When the trim is reattached, the floor guides will be slightly inside the pocket.
Center stops
Center stops prevent this..>>....<<:d)
Inventors/patents
provided two different
ways to "park doors."
To close off the parlor,
you bring each door to
the "50 yard line."
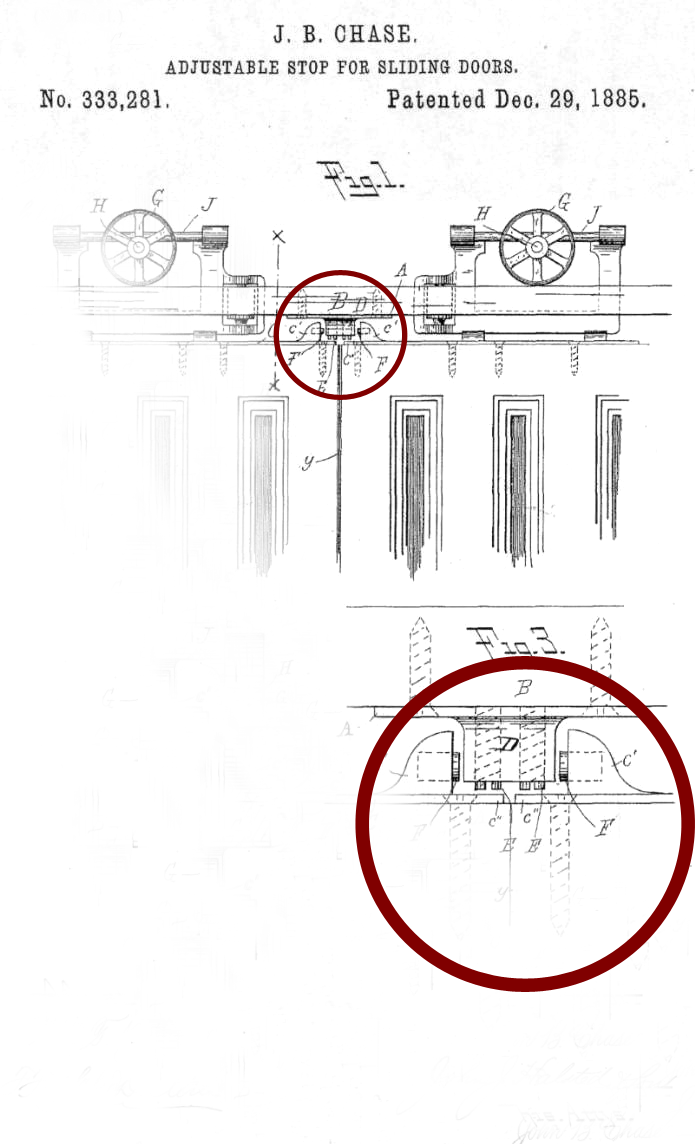
This patent
illustration shows
a center stop mounted
above the doors. But the
center stop is only half
of this "first way" to stop a
door at the middle of the
opening. Atop the door,
the door plate needs to have
some kind of projection-a sturdy
shape which will bump against the
center stop.
So, coming up in the larger circle...
you see what looks like a shark fin-
labeled c' on the detail diagram-
a projection which is cast into the
door plate. Also it is pretty obvious
that a rubber bumper is part of the
device. The east door and the west door dock against the overhead metal stop and hopefully at the same time, the meeting moldings are just touching!
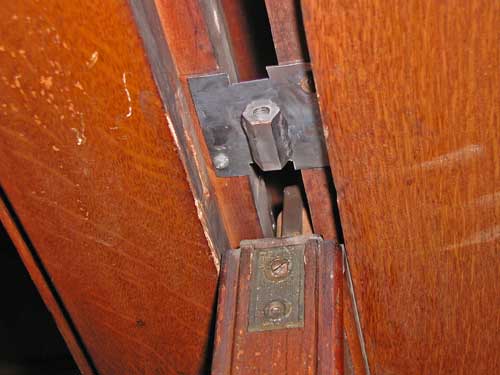
As you might imagine (and as I have witnessed) overhead-mounted center stops get broken or they come loose. So it is necessary to make replacements. Today's substitutes don't have to be pretty. For a customer with a pair of Prindle hangers, I fabricated a center stop from sheet metal and a coupling. A coupling is like an "extended length nut"-it is hexagonal in cross section like a nut and is internally threaded. Pictured below is a 3/8" coupling welded to a piece of sheet metal. Attached to the overhead jamb with two screws, it made a substantial center stop. By the way-neatness counts!! I mean...accuracy <:d) Why did I choose a coupling? Read more below.
In the picture above I was confident of the placement of my new center stop. But if you are unsure of exactly how to do this, try the following: cut the coupling in half; weld one of these short pieces on the sheet metal and attach to the overhead jamb with screws. Then thread short bolts into each end of this foreshortened coupling and, through trial and error, adjust the bolts (in & out) until the doors bump into the stop at just the right place. I just said "until the doors bump..." It is not the edge of the door that is docking against the center stop-rather...the metal "superstructure" of the top door plate encounters the center stop. So...metal touches metal. I suggest the following refinement-buy some liquid "tool dip". For readers who are not "tool aficianados"; the plastic, cushioned handles on quality pliers or wire cutters are the result of liquid "tool dip"- which, for home shop use, is available as a room temperature product. Dip the bolt heads; let dry; insert into the foreshortened coupling and you might obtain a noiseless center stop.

You might imagine that the grooved door bottoms can become mangled, oversized or otherwise corrupted. The next panel shows extreme wear. Plus there's an introduction to the idea of "outriggers." Note: The first photo on my home page shows an outrigger at the bottom of the door.
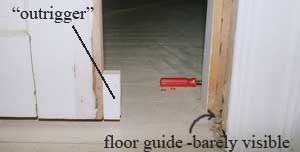
The trailing edge of a pocket door needs a helper. When the door comes out of the pocket to close off traffic...the door itself escapes, i.e. goes past, the floor guide!! You need an outrigger.
Any humble scrap of wood- 1) grooved in the same way as the door bottom and 2) approximately the same thickness (usually 1 3/4") as your door (no thicker, of course) can be nailed or screwed to the trailing edge. With a transverse reach of about 2" -3", the outrigger will do its job; namely, to hover over the floor guide when the rest of the door has escaped the floor guide. Don't look at these instructional photos and get the wrong idea. A pair of doors meets in the middle of the opening yet the trailing edge is still slightly hidden by the (varnished ) trim boards. But the way things are set up-the door has gone past the metal floor guide. The purpose of the outrigger is to stop the door from meandering or "rattling from side to side."
Everything in pocket doors is ratios, proportions and clearance
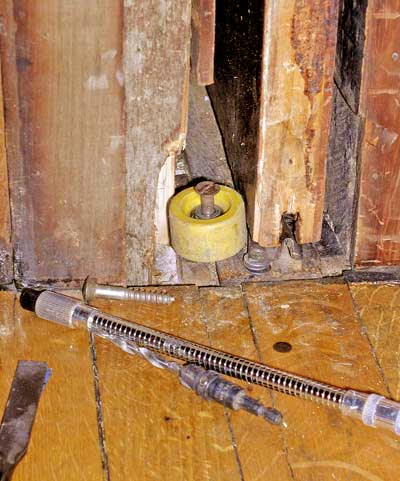
One of my latest and greatest tricks (Spring of 2011) is to use a soft, 'old school' skateboard wheel nestled up against the door to guide the door when the grooved bottom is in really bad condition. Here's the recipe-one soft skateboard wheel with its bearing in place, laid horizontally with several metal washers beneath and several metal washers above, with a substantial flat head or round head wood screw driven vertically. Caution!! If you fail to predrill the hole for the screw-in other words, if the screw you install ends up splitting the wood beneath the skateboard wheel, you will not be happy. :-(


Here's my "latest and greatest tricks" entry for Fall of 2011. As a furniture repairer, I was "forever having" to come up with solutions to problems, so it is comforting to see that ideas (which are applicable to pocket doors) are still popping up in my head. The captions tell the story. This need arose in Summit, NJ-it was the second half of the Waynesboro, PA trip.
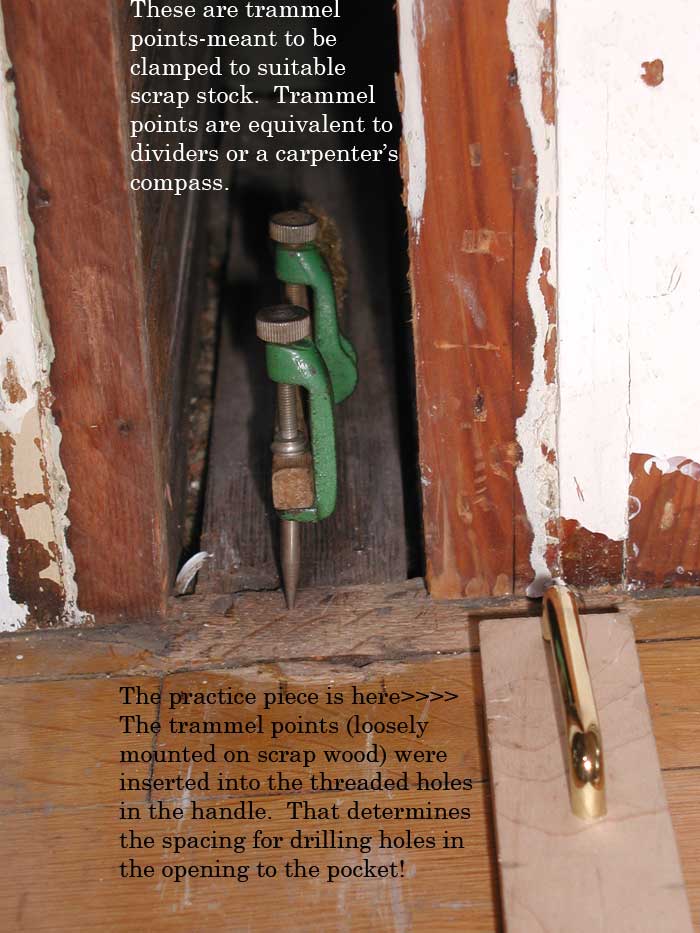
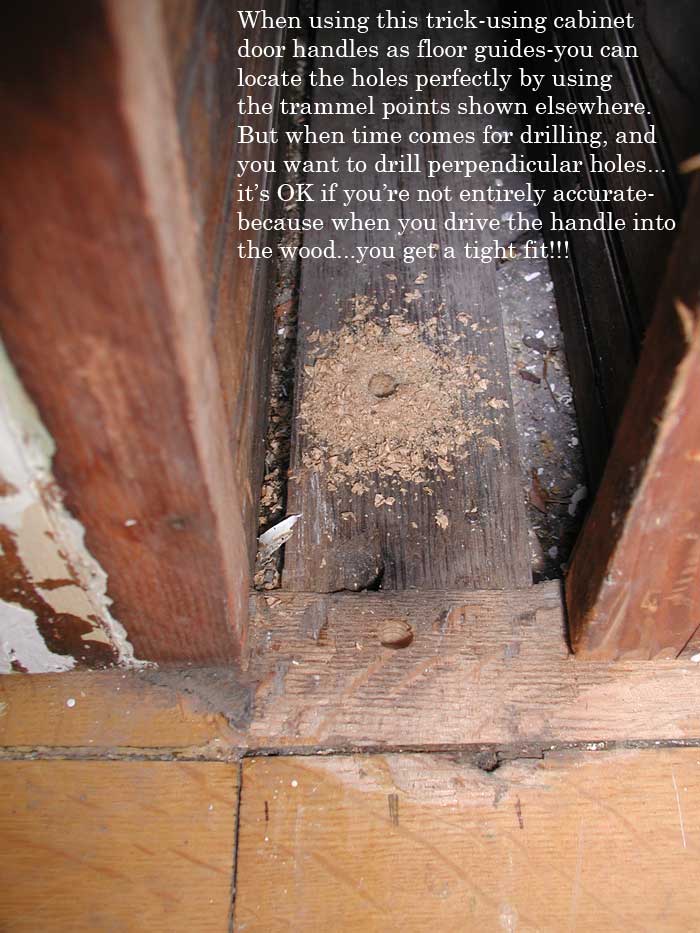
The caption does not make this point clear; once you set the trammel points to have the "same stance", the same spread or distance between the legs of the handle, you place the trammel points at the entrance to the pocket, align them where your door is supposed to travel and hit the trammel points with a hammer. This gives you indentations in the wood and that shows where to drill.
Why do I call these cabinet door handles ubiquitous? Because they are a well established, straightforward (no pun intended) "clean design" - you can pretty much get them at any hardware store, home center or full service lumberyard.